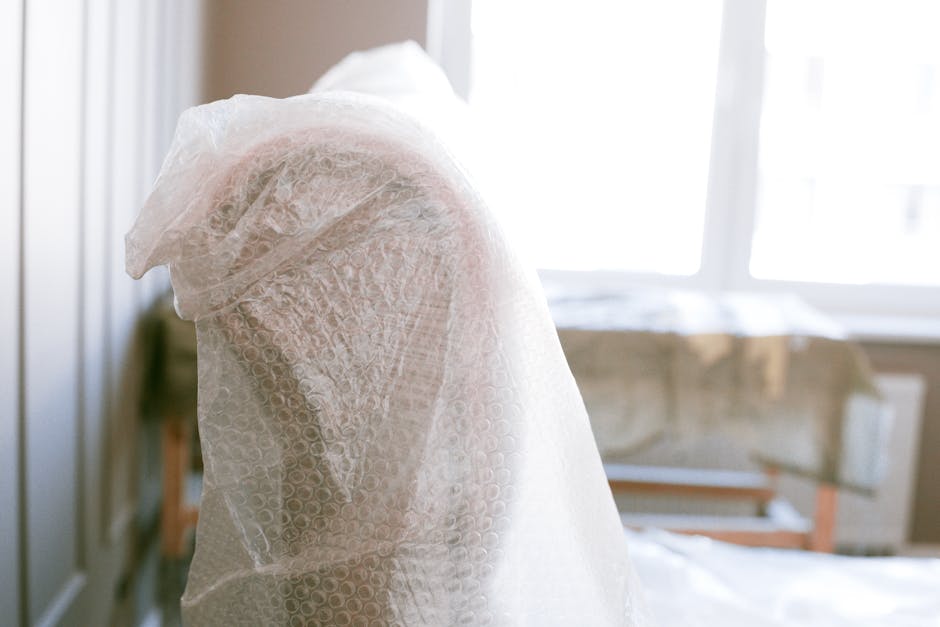
Step by step guide to moving fragile antiques safely across the UK
Posted on 01/10/2026
Moving fragile antiques is never quite the same as moving everyday furniture. A Victorian mirror, a painted cabinet, a porcelain figure with a hairline crack, a grandfather clock with a fussy mechanism, or a marble-topped sideboard all need a slower, more careful approach. This step by step guide to moving fragile antiques safely across the UK walks you through the process in plain English, from planning and packing to loading, transport, and unpacking. If you have ever stood in a doorway wondering whether that one awkward chair leg will survive the journey, you are in the right place.
Truth be told, the hardest part is usually not the lifting. It is the preparation. The right wrapping, the right box, the right vehicle, the right timing. Get those parts right and the move becomes much calmer. Get them wrong and you can end up with chipped edges, loose joints, scratched finishes, or a piece that arrives looking tired before it has even found its new home.
Below, you will find a practical, UK-focused guide that covers what matters most and what experienced movers tend to check before anything precious goes near a van.
Why Step by step guide to moving fragile antiques safely across the UK Matters
Antiques are different from ordinary possessions because their value often comes from a mix of age, condition, craftsmanship, provenance, and sentiment. A scratch on a modern coffee table is annoying. A scratch on an antique walnut chest can change the way the piece looks, feels, and in some cases how it is valued.
That is why moving antiques safely is less about brute force and more about control. You are managing vibration, pressure, temperature changes, awkward angles, and people who may mean well but are not always careful enough. Let's face it, plenty of damage happens in the final 15 seconds: the lift from hallway to van, the turn on a narrow stair, the box being set down a little too hard. That is where good planning pays off.
Across the UK, moves often involve a mix of short urban journeys, rural lanes, stair-heavy flats, and older homes with tight access. A move from a Georgian terrace in Bath feels very different from a ground-floor collection pickup in Manchester or a period flat in London. The furniture may be old, but the routes are not always simple.
When you treat the process as a sequence of small protective steps, you reduce risk dramatically. And that is really the point of this guide: not drama, not guesswork, just a repeatable method that helps your antiques arrive as close to perfect as possible.
Expert summary: fragile antiques are safest when each stage is planned separately: assess the item, prepare the route, pack to prevent movement, load to prevent pressure, and transport to prevent vibration. Simple on paper. Much harder in practice, which is why the details matter.
How Step by step guide to moving fragile antiques safely across the UK Works
The process works best when you break it into manageable stages instead of trying to "just move it carefully". Careful is not a method. A method is a method.
In practice, safe antique moving follows five linked decisions:
- Identify the item's risks. Is it glass, ceramic, wood veneer, gilt, stone, or a mixed-material piece with weak joints?
- Stabilise it for travel. Remove anything loose, protect edges, and stop movement inside the wrapping or crate.
- Match the transport to the item. A small framed mirror does not need the same setup as a marble console table.
- Control handling. That means enough people, proper lifting, and no rushed corner turns.
- Plan for arrival. The safest journey still fails if the item is unpacked carelessly or placed near heat, damp, or direct sun.
Each stage supports the next one. For example, even beautifully packed antiques can fail if they are loaded against a vibrating appliance or wedged at the back of a van without restraint. Likewise, a well-driven route will not save a badly wrapped item with too much empty space inside the box. Small gaps become big problems on cobbles, speed bumps, and roundabouts.
For a local or cross-country move, the same principle applies. Whether you are moving a family heirloom from Kent to Yorkshire or shifting a delicate side table across Greater London, the item should not be left to chance. If you need broader support for the move itself, a look at professional removal services can help you understand the kind of help that is available, while specialist packing advice in packing tips for furniture and belongings can be surprisingly useful for antiques too.
Key Benefits and Practical Advantages
Doing this properly gives you more than peace of mind, although that alone is worth something. It also helps protect the item's condition, your budget, and your time.
- Less risk of visible damage. Chips, scuffs, cracks, and split joints are easier to prevent than repair.
- Lower stress on moving day. When each item is wrapped and labelled properly, the whole move feels calmer.
- Better handling decisions. Some pieces need to be dismantled, some should never be stacked, and some need upright transport only.
- More predictable costs. Proper preparation can reduce the chance of emergency packaging, extra labour, or avoidable delays.
- Cleaner handover at the destination. The unpacking stage goes faster when you know exactly what each item needs.
There is also a subtle but important benefit: confidence. Once the packing is done well, you stop worrying about every bump in the road. You can still be careful, obviously, but you are not clutching your tea and staring into the back of the van like a worried museum guard. Well, not quite.
For antiques that are awkward, oversized, or unusually valuable, extra preparation can also help you decide whether a removal company, a man and van, or a more specialist transport option is appropriate. If you are comparing approaches, the guide on man with van versus removal company is a useful place to start. It helps you weigh flexibility against full-service support, which is often the real decision for fragile items.
Who This Is For and When It Makes Sense
This guide is for anyone moving delicate, older, or high-value household items anywhere in the UK. That includes private homeowners, landlords, collectors, inherited-estate planners, auction buyers, interior decorators, and families helping a relative downsize.
It makes sense especially when:
- the item is fragile, brittle, or has loose joints
- the item is sentimental and irreplaceable
- the item has ornate finishes, mirrors, glazing, or carved details
- the route involves stairs, narrow hallways, or long carrying distances
- the move is between towns, counties, or storage locations
- you are uncertain whether the item should be dismantled
It also makes sense if you are deciding between doing it yourself and paying for help. In our experience, people often underestimate the risk not because they are careless, but because the item has always "seemed fine" sitting still in the house. Movement changes everything. A piece that is stable on a sideboard can become awkward the moment it is tilted, turned, or compressed.
If your move involves a broader household relocation, the article on how to deal with home removals gives a useful overview of the wider process. That wider context matters because antiques rarely move on their own; they move as part of a bigger day, with boxes, furniture, people, and a clock that seems determined to run late.
Step-by-Step Guidance
1. Identify the item and inspect it closely
Start by checking what you are actually moving. Not just "a cabinet" or "an old lamp", but the details. Look for loose glass, missing screws, lifting veneer, cracked glaze, weak handles, or any section that already moves when it should not.
Take photos from multiple angles. That is useful for your own records and for spotting condition changes later. If the item has drawers, lids, removable shelves, or attached mirrors, note those too. A few minutes here can save a lot of guessing later.
If you are moving several antiques, separate them by risk level. A small framed print and a porcelain vase do not need the same packaging plan.
2. Measure the piece and the route
Measure height, width, depth, and especially the awkward parts: handles, feet, finials, and mirror tops. Then measure doors, stair turns, landings, lifts, and the van entrance. Older UK properties can be charming and inconvenient in equal measure.
This is where people get caught out. The item may fit through the front door on paper, but not once you add padding, or not when you realise the stair turn is tighter than expected. If you can, check the route in person before moving day.
3. Choose the right packing materials
For fragile antiques, standard supermarket boxes are rarely enough on their own. You want materials that cushion, support, and prevent movement.
- double-walled boxes for smaller items
- acid-free tissue for sensitive finishes
- foam wrap or bubble wrap for cushioning
- corner protectors for frames and flat surfaces
- moving blankets for wood, polish, and painted surfaces
- strong tape that seals well without peeling back
- labels, marker pens, and "fragile" markings used sensibly, not as magic words
A small note on bubble wrap: useful, yes, but do not let it touch delicate finishes for long periods if you are storing the item wrapped. Some antiques prefer a layer of tissue or soft cloth first. If in doubt, err on the gentler side.
4. Prepare the antique before wrapping
Remove loose pieces, keys, detachable shelves, glass inserts, and ornaments where possible. Secure doors and drawers so they do not swing open in transit. If a lock or hinge is already weak, do not force it. Better to secure the piece more carefully than to break the original fitting.
Where appropriate, wrap individual removable parts separately and label them clearly. One of the most annoying little jobs after a move is opening a box and finding three tiny brass fittings with no clue which item they came from. Nobody wants that game.
5. Wrap in layers and stop movement inside the package
Wrap the item so the outer layer protects it, but the inner layer keeps surfaces safe. Then fill any empty space in the box or crate. The goal is not just padding. It is immobilisation.
For example:
- glass or mirror: protect the surface, corners, and edges first
- wooden furniture: protect high-wear areas and vulnerable carving
- ceramics and porcelain: separate delicate elements and use generous cushioning
- stone or marble: protect edges and keep the piece upright and supported
Do a gentle shake test only after sealing. If you can hear movement, the packing needs more support. Quiet is good. Silence is better.
6. Label everything clearly
Labels should tell the handler what the item is, what side should face up, and whether it is especially fragile. You can also note "open first" or "lift from base only" where relevant. Keep the language short and readable.
It helps to create a simple inventory list too. That list becomes handy if several antiques are moving together or if some pieces are going into storage. If you are doing a mixed move, the packing guidance in proven packing methods for an efficient house move is worth reading because the basics of inventory and grouping still apply.
7. Load the van in the right order
The heaviest and most stable pieces should generally go in first, with fragile antiques placed where they will not be crushed or knocked. Keep antiques away from anything that shifts, leaks, or vibrates excessively. Try not to leave empty gaps where items can slide sideways during braking.
Straps, blankets, and separators matter. So does patience. A rushed load is often a bad load. To be fair, most damage in transit starts at the loading stage, not the motorway.
8. Drive with stability in mind
Whether the move is across town or across the country, smooth driving matters. Antiques dislike sudden braking, harsh cornering, and repeated jolts. If possible, avoid peak congestion, broken road surfaces, and unnecessarily long idle periods in poor weather.
For long journeys, it can help to check the load after the first few miles, especially if the van is making a multi-stop run. A quick inspection is worth the extra minute. The road is rarely the main problem; movement inside the vehicle is.
9. Unload slowly and inspect at once
When you reach the destination, do not rush the first few minutes. Unload each antique with the same care you used at the start. Then inspect it before putting it away. Look for fresh chips, movement, loose joints, damp packaging, or any shift in alignment.
If you spot a concern, photograph it immediately. Small issues are easier to deal with while the move is still fresh in everyone's mind. And if all is well, take a breath. That part matters too.
10. Place the item correctly in the new space
Keep antiques away from radiators, direct sunlight, damp walls, and heavy foot traffic. A lovely piece can be slowly damaged simply by being placed in the wrong corner. If it is a cabinet, make sure the floor is level. If it is a mirror or artwork, make sure the fixings are suitable for the wall and the weight.
Give the item a little time before deciding whether any adjustments are needed. Some wood and finishes settle after transport. There is no need to fuss at every small creak, but do keep an eye on it in the first day or two.
Expert Tips for Better Results
A few details make a bigger difference than people expect.
- Pack by material, not just by room. Similar materials often need similar protection.
- Use more padding than you think. Antique surfaces are less forgiving than modern finishes.
- Keep hardware together. Small bags for screws, handles, and brackets save headaches later.
- Protect corners first. Corners and edges take the brunt of knocks.
- Avoid over-tight wrapping on fragile joints. Tension can cause more trouble than it solves.
- Do not stack by default. If something is delicate, let it travel alone.
One useful habit is to imagine what could happen if the van hit a pothole, not a pothole the size of a lake, just a normal British one. If the answer is "the item would shift", then the packing is not finished yet.
Another tip: keep a small "first open" kit with scissors, gloves, tape, markers, and cloths. It sounds basic, but that kit can save time and reduce rough handling during unpacking. Funny how the unglamorous things are often the most useful.
If you are trying to reduce stress more generally during the move, the article on stress-free house moving has some helpful mindset and planning advice that applies surprisingly well here too.
Common Mistakes to Avoid
Most antique-moving damage comes from avoidable errors. The good news is that once you know them, they are easy enough to dodge.
- Using the wrong box size. Too much space means movement; too little space means pressure.
- Packing with no inventory. If items are unlisted, parts go missing.
- Leaving drawers full. Weight shifts inside the piece and can strain the frame.
- Ignoring weak points. Loose joints, old glue, and hairline cracks need special attention.
- Forgetting access issues. A perfect pack still fails if the route is too tight.
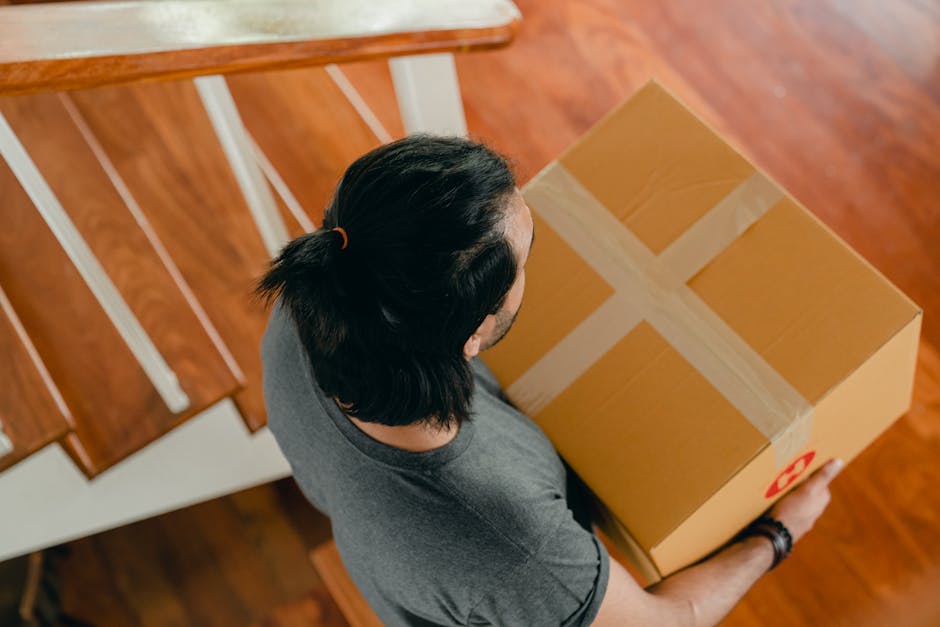
- Letting people "just help" without guidance. Helpful hands are great, but only if they know what they are lifting.
- Relying on labels alone. "Fragile" does not stop gravity.
One particularly common mistake is treating antiques like any other furniture because they "look sturdy". Looks can be deceiving. A heavy-looking item might have a weak veneer, a repaired leg, or a brittle decorative section. Always check the piece itself, not just the impression it gives.
Tools, Resources and Recommendations
You do not need a warehouse full of kit, but a sensible set of tools makes the work safer and neater.
| Item | What it helps with | Why it matters |
|---|---|---|
| Double-walled boxes | Small antiques, books, ornaments | Better protection against crushing and puncture |
| Moving blankets | Wood, polish, carved surfaces | Reduces scuffs and rubbing in transit |
| Corner guards | Frames, mirrors, tables | Protects the parts most likely to chip |
| Foam or tissue wrap | Delicate surfaces and finishes | Adds cushioning without harsh contact |
| Labels and markers | Organisation | Makes unpacking and handling easier |
| Straps and tie-downs | Vehicle loading | Stops items sliding in the van |
There are also a few wider resources worth using if your antique move is part of a bigger relocation. For budgeting context, house moving costs can help you think about how transport, packing, and extra care fit into the overall budget. If you are deciding whether a more compact service is enough, the page on man and van can help frame that choice.
If storage is part of the plan because your new place is not ready, the article on the pros and cons of self storage is useful before you place antiques into temporary holding. Antiques in storage need the same kind of protection they need in transit, only for longer. That is where many people get caught out.
Law, Compliance, Standards, or Best Practice
For most household antique moves, there is no special legal framework that changes how you pack a chair or a cabinet. That said, there are still some important best-practice considerations in the UK.
Health and safety: anyone lifting or carrying heavy or awkward antiques should avoid unsafe manual handling. Use enough people, keep loads balanced, and do not twist under weight. If a piece is too heavy or too awkward, stop and reassess. Pride has never moved a marble table safely.
Insurance: check whether your home contents cover, removal cover, or transport cover applies to antiques specifically. Do not assume. Ask clearly about exclusions, value limits, and any requirement to declare high-value items in advance. If the item is especially valuable, it may need separate cover or a special declaration.
Condition records: take photos before the move and at delivery. This is good practice even when nothing goes wrong, because it gives you a clear record of condition. Keep receipts for packing materials, specialist services, and any professional handling arranged for the move.
Specialist handling norms: for highly delicate or unusual antiques, many movers will suggest bespoke packing, itemised labelling, and dedicated loading space. That is not overkill. It is the sensible response to an item that cannot be replaced quickly or cheaply.
Listed or historically significant items: if you are moving items with unusual heritage, conservation, or restoration value, consider speaking to a specialist beforehand. Not every antique needs museum-style treatment, but some really do.
Options, Methods, or Comparison Table
When moving fragile antiques across the UK, you usually have three practical approaches. The best one depends on value, fragility, distance, and how much hands-on support you need.
| Method | Best for | Pros | Cons |
|---|---|---|---|
| DIY with personal vehicle or van hire | Small, less fragile, lower-value pieces | Cheaper upfront, full control | Higher risk if packing or lifting is poor |
| Man and van | Single items, short moves, flexible jobs | Practical, often quick, helpful for lighter loads | May not suit very high-value or highly delicate antiques unless care is specifically arranged |
| Full removal service | Multiple antiques, heavier furniture, complex access | More support, more capacity, often better for careful coordination | Usually costs more and needs more planning |
There is no one-size-fits-all answer. A small gilded mirror might travel happily with a careful man and van setup, while a matched pair of antique cabinets with glass fronts may justify fuller support. If you are unsure, compare the item's fragility against the level of handling it will face, not just the distance travelled.
For some readers, the article on is it a good idea to hire man and van? will help with the first part of that decision. It is not specifically about antiques, but the service comparison is relevant.
Case Study or Real-World Example
Here is a realistic example based on the sort of move that comes up all the time.
A family moving from a townhouse in West London to a house in Surrey had three fragile items that worried them most: an antique mirror, a glass-fronted display cabinet, and a small inlaid writing desk inherited from a grandparent. None of the items was enormous, but all three had vulnerable edges and some wear in the joints.
They began with photographs and measurements. The mirror was wrapped with corner protection and soft layers before being placed in a fitted box. The cabinet shelves were removed and packed separately. The writing desk had its drawers taken out and labelled. On moving day, the items were loaded last so they could be unloaded first, which turned out to be a very sensible little decision.
What made the biggest difference was not any dramatic technique. It was patience. They did not rush the packing, and they did not assume the items could "probably" handle a knock or two. Everything was handled at waist height where possible, and the vehicle was packed so nothing could slide. In the end, the move went smoothly, and the items arrived with no visible damage.
That sounds simple, almost too simple, but most good antique moves are like that. Calm, methodical, slightly boring in the best possible way.
Practical Checklist
Use this quick checklist before the antiques leave the property.
- Photograph each item from several angles
- Measure the item and the route out of the property
- Check for loose joints, chips, glass, or weak fittings
- Remove detachable parts where appropriate
- Wrap delicate surfaces with the right protective layers
- Pack corners, edges, and vulnerable details first
- Fill empty space inside boxes or crates
- Label the item, its orientation, and any handling notes
- Confirm who is lifting each piece and how many people are needed
- Keep the item away from heat, damp, and unstable loads in the van
- Inspect again on arrival before storing or placing
- Keep the condition photos and notes until the move is fully settled
If you can tick all of those off, you are in a much better position than most people. And yes, it really does make a difference.
Conclusion
Moving fragile antiques safely across the UK is not about being perfect. It is about being thoughtful, measured, and a little stubborn about doing the basics properly. Measure carefully. Wrap carefully. Load carefully. Unpack carefully. That steady approach protects the item, reduces stress, and gives you the best chance of a smooth arrival.
Whether you are moving a single heirloom or an entire collection, the same principle holds: give the item the level of care it deserves before the van ever starts moving. Once you do that, the rest of the journey becomes much easier to manage. Not effortless, perhaps. But manageable, and that is a good place to be.
If your move includes other delicate furniture, route planning, or a need for extra hands, it can help to compare service options and get the right support early. A bit of planning now usually saves a lot of grief later.
Get a free quote today and see how much you can save.
There is something satisfying about seeing a treasured piece land safely in its new room, all set for another chapter. That is the real win, to be fair.